This article applies as of PRTG 22
Explore PRTG QoS Round Trip monitoring, utilizing a Python QoS Reflector script on Linux devices for streamlined QoS measurement without remote probes.
QoS round trip monitoring without remote probes
In general, PRTG measures the Quality of Service (QoS) of a connection by sending UDP packets from one end of the connection to the other end of the connection. Regarding the QoS (Quality of Service) Round Trip sensor, the traffic packets are sent back from the end of the line to the source and the sensor measures various QoS parameters of this packet round trip.
Because it is mandatory to have two endpoints for QoS measurements, you need a reflector for the UDP packets at the target. You can use a remote probe at the connection end for this purpose, or you can use the QoS Reflector. The source of the packets is a device that you added to PRTG.
QoS Reflector for the QoS Round Trip sensor (open source)
The QoS Reflector is a Python script that bounces all incoming UDP packets. Because of this, you can use it as a QoS endpoint on a device that you plug in at the end of the connection you want to measure, for example, on a small Raspberry Pi.
The main advantages of the QoS Reflector in comparison to a remote probe for QoS monitoring are the quick setup and that it is compatible with any platform that runs a Linux-based operating system, so you do not need a Windows device at the connection end. We provide the QoS Reflector as an open source project on GitHub. Follow the steps below to set up the reflector for a QoS (Quality of Service) Round Trip sensor.
Notes
- The PRTG QoS Reflector currently does not support the QoS (Quality of Service) One Way sensor.
- This is an experimental feature. Currently, it is in beta status. The methods of operating can change at any time, as well as the available settings. Do not expect that all functions will work properly, or that this feature works as expected at all. Be aware that this feature can be removed again from PRTG at any time.
- This article is provided for your information only. The steps described here have been tested carefully. However, we can neither offer deep technical support for customizing this script nor for writing your own scripts.
Requirements
You need to fulfill the following requirements on the device on which you want to use the QoS Reflector as the connection endpoint:
- Any Linux-based operating system
Note: Although originally written for Linux systems, you can use the QoS Reflector on Windows systems as well with minor changes to the script. - Python 2.7 or later: see python.org Furthermore, you need a PRTG core server version 14.x.12 or later to use a QoS (Quality of Service) Round Trip sensor with the reflector.
Setup
Follow the steps below to measure the quality of service of a connection with the QoS Reflector.
Step 1: Prepare and call the script
Basically, you just have to copy the QoS Reflector script to a device at the connection target and execute it.
- Download the QoS Reflector package from GitHub and copy it to your Linux distribution.
Note: If you want to set up the QoS Reflector on a Raspberry Pi, give the Raspberry Pi a static IP address and put qosreflect.py on the root of the storage system. - Make the file qosreflect.py executable, for example, use the following command:
chmod 755 qosreflect.py - Optionally, create a configuration file qosreflect.conf with the following content:
host:All port:50000 replyip:None - Execute the script:
./qosreflect.py [-h] [-p PORT] [-c CONF] [-o HOST] [-r REPLYIP] [-d] - Note: On a Raspberry Pi, we recommend that you set the QoS Reflector script to boot at startup.
We recommend that you use parameters with the script call. This enables you to run several instances of the PRTG QoS Reflector. The following parameters are available:
| Parameter | Description |
|---|---|
| --port PORT | Provide the port number as defined for the respective QoS (Quality of Service) Round Trip sensor in PRTG. |
| --host HOST | Provide the IP address of the interface that you want the script to bind to. We recommend that you use All to bind all available interfaces. |
| --replyip REPLYIP | Optional: Provide the IP address of the probe that sends the UDP packets. The reflector will only reply to this IP address. |
| --conf CONF | Optional: Use this parameter only if you do not use the port and host parameters in the command. The script will then use parameters as defined in your configuration file. Provide the path to the configuration. If you do not provide this argument, the default configuration file qosreflect.conf will be used. |
| --debug | Optional: Set this argument to get detailed debug output. |
| --help | Use this argument to show all available parameters. |
Example: ./qosreflect.py --port 50000 --host All
Step 2: Add a QoS (Quality of Service) Round Trip sensor to PRTG
If you have not created a QoS (Quality of Service) Round Trip sensor yet, do so now.
- Add the QoS (Quality of Service) Round Trip sensor to a device on any probe, depending on which connection you want to monitor.
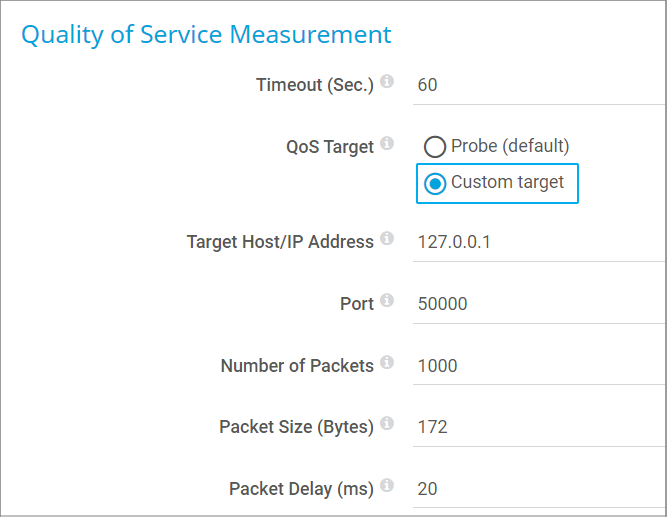
- In the sensor settings, select the option Custom target for QoS Target.
- In the Target Host/IP Address field, enter the IP address of the system on which the QoS Reflector script runs.
- The Port number must match the port that you use for calling the script (either the argument or the configuration file definition).
- You can leave all other settings unchanged.

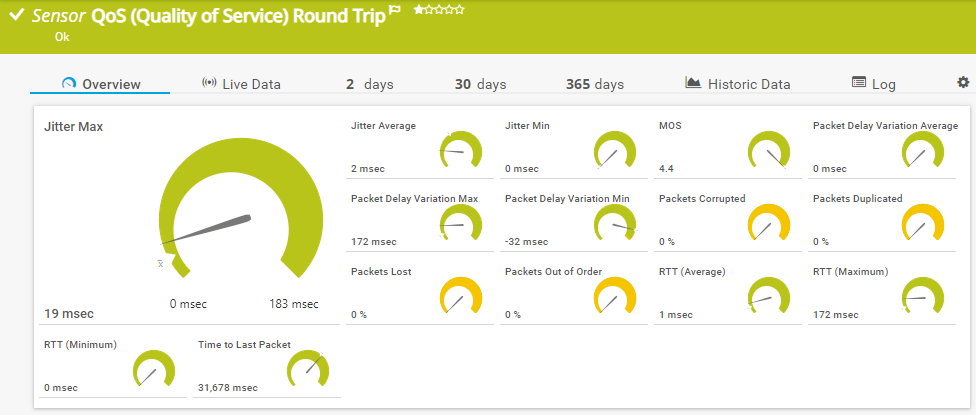
Wait a few moments and the sensor will show you its QoS measurements for the connection to and from the target device.

QoS Reflector on Windows systems
One of our customers successfully runs the QoS Reflector on Windows systems.
- In the QoS Reflector script, remove the first line that defines the interpreter:
#!/usr/bin/env python - Run the QoS Reflector from the command line and specify the Python interpreter as the application:
<your_path>\Python27\python.exe reflector.py --port 50000 --host All - Configure your QoS (Quality of Service) Round Trip sensor as described above.
Thank you, Jordan, for sharing this information!
Debugging
If you encounter any issues with your QoS Reflector, call the script with the parameter -d or --debug to get detailed information.
More
Disclaimer:
The information in the Paessler Knowledge Base comes without warranty of any kind. Use at your own risk. Before applying any instructions please exercise proper system administrator housekeeping. You must make sure that a proper backup of all your data is available.
